Project 18

Classic Parker Boat Forum

Help Support Classic Parker Boat Forum:

This site may earn a commission from merchant affiliate links, including eBay, Amazon, and others.

camron

Well-known member
Joined
Nov 23, 2011
Messages
662
Reaction score
25
Location
Long Island NY
Hi guys I started de-rigging my 18 parker that I picked up last fall because it needs a floor and some stringer work. Odd there a 4 screws holding in the console and 4 screws holding in the cooler seat but 12 screws holding in the wood trim around each all unsealed and that is the main area of the rotted floor. I got most of the supplies on order to do the glass work as well as all the 3/4 plywood. What would your opinions be on the fuel tank? It was made in 1987. Being I am going to have everything ripped out it would be prime time to replace it as well what are your opinions?

Pictures to follow once I get some more progress on it.

Camron
 
A 27yr old tank is due.

At the VERY min. Remove and inspect the tank......See any pitting? Replace it! R&R all fuel hoses while your there.

Suggest you get a hold of some large heavy weight paper to use to make a pattern BEFORE you start cutting.

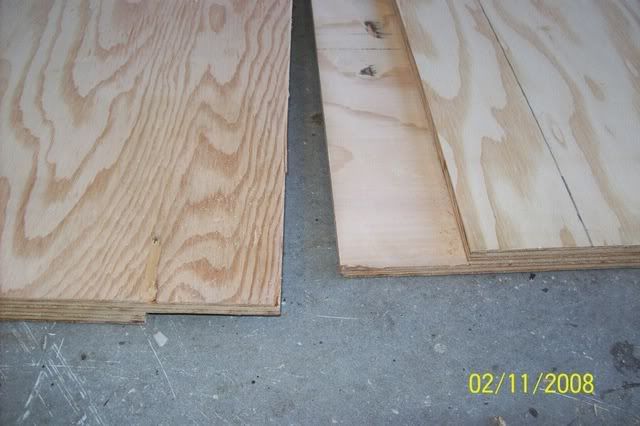
Suggest that you run the sheets across the hull with 4ft side moving from Bow to Stern. Use a router....Remove 3in wide X 3/8in deep Rabbit on edge of each piece.

This make a smooth transition and plenty of glue surface area. Glass the underside of the sheets before they are installed.

100_0299.jpg


Pay attention to orientate the "A" side up when your cutting.


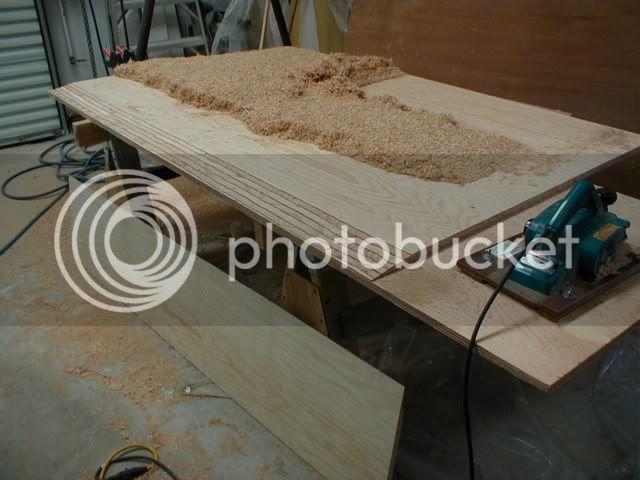
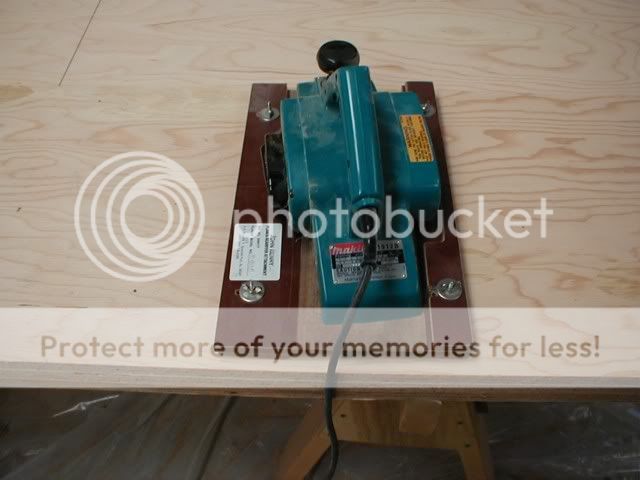
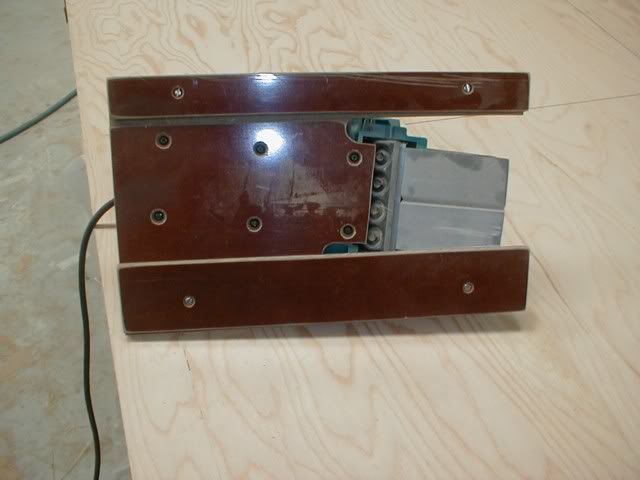
Or If you have a Scarfing jig....You can do it that way. :D

P1010183.jpg


P1010182.jpg


P1010181.jpg


Not a great pix, but look close.

P1010184.jpg
 
Worthog Thanks for all the information and pictures!! I had the same thoughts on that tank because it's so old already to just get new. That was my plan on getting some heavy duty paper and making a template prior to cutting anything out. I like the looks of the scarfing better than the routing looks like a stronger set up. Where did you get that jig from? I think I would like to go with that set up. I was googling them and only saw them up to 3/8 inch plywood anything different you did to accommodate 3/4 inch?

This is a great forum so many people with great knowledge and experiences to share
 
There are some options....The one I have is the best, but it's not cheap.

It is the John Henry....He's been around a long time and is not that far from me. I went to his house in Spanish fort, Al. to get mine. It will do thicker plywood than what it says, as the pix's you see of the Scarf are 3/4in. Make SURE you wear a particle mask. There is a tremendous amount of dust.

http://johnhenryinc.com/

http://forum.woodenboat.com/showthread. ... and-glueup


https://sites.google.com/site/warrandyt ... ng-plywood


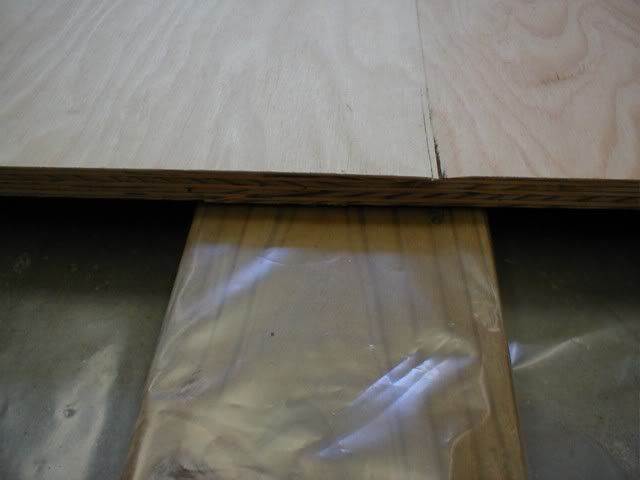
You will notice the 2X6 under the last pix in the above post. It's covered with Visqueen [Sheet plastic] You use drywall screws to screw thru the joint and into the 2X6. Now you do this dry the 1st time....because when you wet it out with Epoxy it will be real slippery and you don't want to have the shavings from the pilothole in the mix. So do it dry, take it apart, wet it out and screw it together. BUT....Remove the screws after the Epoxy is in a Green state.

You will find it easier to install the plywood using the lap joint, as you can actually install each piece one at a time in the boat and glue it up.
With the scarf joint your pretty much going to need to make the whole floor and then set it in. This will be Super heavy and unwheelding.


Here's some ideas.

http://forum.woodenboat.com/showthread. ... -Jig-Ideas
 
Don't be surprised if the plywood is bad all over.when I did my 89 Parker I had a small soft spot by the console.Ended up removing entire floor.Water soaked plywood all over to the point it dripped when removed
 
That makes sense about having to make the whole floor then install as one piece. Seems like it may be a difficult task while working alone. So I will be doing the lap joints instead. Plus I already have a router and those tools.

Thanks
 
I will defiantly be taking pictures of the whole process as I have enjoyed reading so many others projects
 
Here is what I have gotten done so far console cooler seat removed. Engine removed (sold) Windlass removed (sold). battery boxes removed template made for the floor out of that heavy paper contractors use so they don't scuff up wood floors while they are working. Still need to remove all of the cleats and other misc. stuff that is all over the gunnels. Hopefully this week I will cut the plywood out for the floor and maybe get the floor opened up and see how everything looks under there. I know the stringers have rot on them but I think the box up front is good as the forward area is still very firm as well as the box around the bilge area feels good. Feels good to be able to get outside and be able to work on something even though its in the garage it has been to cold to do anything out there. Feels like this winter has been a long one.
 

Attachments

  • pictures 009_opt.jpg
    pictures 009_opt.jpg
    26.5 KB
  • pictures 011_opt.jpg
    pictures 011_opt.jpg
    29.4 KB
  • pictures 028_opt.jpg
    pictures 028_opt.jpg
    25 KB
  • pictures 109_opt.jpg
    pictures 109_opt.jpg
    37.5 KB
  • pictures 146_opt.jpg
    pictures 146_opt.jpg
    27.3 KB
  • pictures 147_opt.jpg
    pictures 147_opt.jpg
    23.5 KB
So I started pulling up a piece of the floor today. Looks like the glass never actually adhered to the plywood. I can pull on a small pieces and pull up most of it without using the saws all. Also did parker not rabbit the floor joints when the built these boats in 1988? Like warthog showed up top? Also looks like the floatation foam is fully saturated with water so I will most likely be replacing all of that. What density foam would be good for use? Floor under the glass is actually so weak in some spots my foot feels like it will go through it. I will post a few pictures later on tonight

Thanks for all the help with this guys

Camron
 
I wonder if this is the 2nd deck on this boat as the deck also had no non skid paint on it just seems to have been jell coated. I found about 8-10 inches of plywood where it doesn't look like the water got to yet. Going to need some more saws all blades and to get my electric powered one also as I went through a few batteries fairly quick.
 
Sorry for the delay but here are the pictures
 

Attachments

  • 009_opt.jpg
    009_opt.jpg
    38.9 KB
  • 010_opt.jpg
    010_opt.jpg
    59.4 KB
  • 011_opt.jpg
    011_opt.jpg
    50.7 KB
  • 012_opt.jpg
    012_opt.jpg
    43.7 KB
  • 013_opt.jpg
    013_opt.jpg
    49 KB
Hi Guys it has been a little while since I updated this thread since I have been in the process of purchasing my new house. but I have gotten a little bit more work done this past weekend and today. If you see the first pictures so far it looks like I have one good stringer out of the four. I took warthogs advice and even though the top area of the tank looked good I pulled it up and out and found the whole bottom of the tank pitted and leaking fuel.... all of the foam around the tank was completely soaked in fuel and weighed about 100+ pounds. I got the tank out and brought it over to Ram Welding in Farmingdale they did a very nice job on the new tank and had a fast turn around of 5 days. I have a total of about 70% of the floor removed and hopefully will get the rest of the deck removed and also the foam removed this week.
 

Attachments

  • IMG_0791 (640x480).jpg
    IMG_0791 (640x480).jpg
    85 KB
  • IMG_0793 (800x600).jpg
    IMG_0793 (800x600).jpg
    96 KB
  • IMG_0792 (800x600).jpg
    IMG_0792 (800x600).jpg
    133 KB
  • IMG_0774 (600x800).jpg
    IMG_0774 (600x800).jpg
    184.1 KB
  • IMG_0775 (600x800).jpg
    IMG_0775 (600x800).jpg
    124.3 KB
That old tank looks like it had been sitting in water for awhile.
Will you be coating the new tank before putting it all back together?
 
I was thinking about coating it with the interlux epoxy, unless someone knows of something better?
 
I don't know first hand what the best choice is, but I do know Warthog as used coal tar epoxy on his previous projects.
You might want to see if he has found a better product or not.
 
Back
Top