Replacement Batteries

Classic Parker Boat Forum

Help Support Classic Parker Boat Forum:

This site may earn a commission from merchant affiliate links, including eBay, Amazon, and others.
sparky":n1qjuq07 said:
It seems odd that there's 5+ additional items in the stern that need power. If any of your wiring runs forward, couldn't you attach it to the main breaker panel in the console?

You could also try adding a direct connect kit: http://www.defender.com/product.jsp?pat ... 7&id=51576
It doesn't take up much room, and gives you 4 terminal connections right at the battery.

From memory... Two bilge pumps, two bilge counters, one high water alarm, the Guest battery charger (one pair to each battery), oh and the negative leads to the fuel tank senders.
Pretty sure that is all of the items you are seeing there, but that is from memory. Nothing there is going forward.

Those direct connects look interesting. If I can't do buss bars, that might work to tidy things up.
 
Update on this project...

I bought the Marinco direct connect items back during the summer, but it was WAY to hot to work on this project in the summer heat.

201420_l.jpg


Spent almost 5 hours today laying on the deck with my head in the bilge installing...
Most all the wires needed to be lengthened, so a lot of time was spent cutting, butt splicing, shrink protecting, re-routing, and installing.

Was able to finish Battery #2 and half of Battery #1, so hopefully I can wrap this up tomorrow.
My knees and back are killing me. :(

Photos to follow when I wrap this up.
 
You didn't use those Automotive ends did you?

Oh....Did you look at what holes your motor is mounted in Kev?
 
warthog5":22tmahns said:
Oh....Did you look at what holes your motor is mounted in Kev?

Forgot to get a photo yesterday. I'll get it today.
Gotta go back down and finish the job this morning. Photos after I'm done.
 
OK... finally finished up this morning.
Here are the photos I promised...

When I replaced my Optima Blue-Tops in the spring, I did so with Lifeline Marine AGM's.
At the time, due to the heat, I simply re-attached all of the accessory wiring to the posts. My plan was to fix everything in cooler weather.
This is what I started with yesterday.
 

Attachments

  • DSCN0001.jpg
    DSCN0001.jpg
    160 KB
Because I was using the Marinco concentrators, much of my wiring needed to be replaced, re-routed, or extended.
Connections used were marine grade (glue) splices and heat shrink.
Battery cables that had exposed tinned wire were covered with liquid electrical tape, or shrink.

These connections were typical.
 

Attachments

  • DSCN002.jpg
    DSCN002.jpg
    94.5 KB
  • DSCN003.jpg
    DSCN003.jpg
    78.1 KB
In order for the Marinco concentrator to fit the positive post, it had to releived a bit to provide clearance.
This was done by chucking a rat-tile file in a cordless drill motor, and relieving until the bolt would pass.

Once that was done, the positive terminal on Battery #2 was the first to be attached.
 

Attachments

  • DSCN005.jpg
    DSCN005.jpg
    96.3 KB
  • DSCN006.jpg
    DSCN006.jpg
    98.2 KB
Each terminal had its share of old ring terminals left over as I worked my way down the line.
 

Attachments

  • DSCN007.jpg
    DSCN007.jpg
    100.9 KB
The last order of business was to clean up all the wiring with zip-ties.
While I was doing this, I allowed room to be able to remove the fuse for the bilge pump counters during 'normal conditions' (good weather).

When I installed the counters awhile back, I did not realize that the counters constantly draw power as they 'poll' the voltage on the bilge pumps.
In the past, that polling ran my batteries down. :(

On a larger boat that is always plugged into shore power, this would never be an issue.
In my case, my boat only gets plugged in during periods of bad weather (nor-easters, hurricanes, or extended rainy periods) to make sure the pumps always have maximum power.

So... during those events of extreme weather, the boat will be plugged in and the bilge counter circuit fuse will be re-inserted.
I considered a switch of some sort, but this method was deemed acceptable.

Project completed.
 

Attachments

  • DSCN0010.jpg
    DSCN0010.jpg
    127.7 KB
Almost forgot...
All connections got a shot of CorrosionX when I was done. :)
 
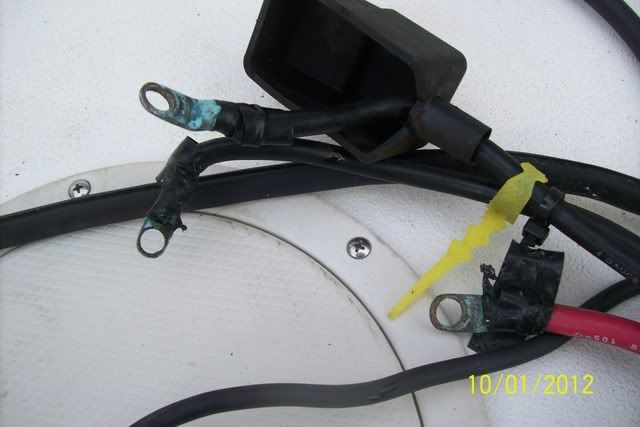
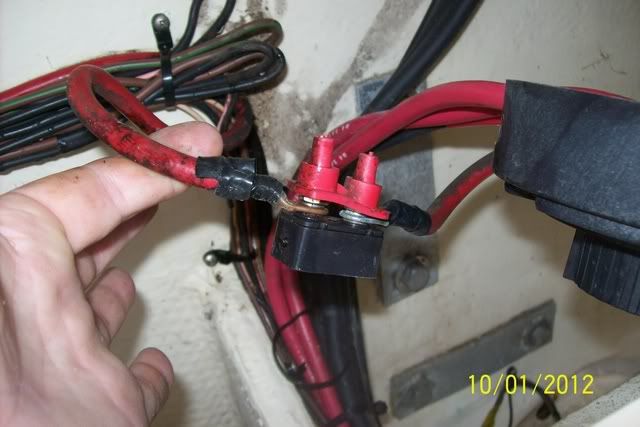
Kev.....I'd like to see you cut every one of those non tinned ends off of those battery cables and put tinned ends and heatshrink with the glue in it. I just pulled the battery cables out of mine late this afternoon. They will be totally remade with Marine components, Not Automotive stuff.

More bare copper ends.

100_4054.jpg


Bare copper ends + Automotive thermal circuit breaker. I've seen these go bad in a Marine environment in less than a year.

100_4058.jpg
 
I have a question for you Guys. Do you see anything wrong with using solder to make lug terminal connections instead of hammer crimp? What I have done in the past was to hold a terminal lug in a vice, or with vice grips. Then heat with a torch and partially fill with solder. I would then insert the wire or wires into the hot solder. This seemed to work well to combine several small wires into one lug terminal. Thanks
 
There are actually ends available that use a solder pellet. You drop the pellet in heat the lug and push the cable in.

I don't use them, as I have the crimping tool.

214080.jpg


No there is nothing wrong with it, but it can make you cable stiffer if the solder sucks up the cable length a little farther.
 
Jpeg":2xj8e7n2 said:
I have a question for you Guys. Do you see anything wrong with using solder to make lug terminal connections instead of hammer crimp? What I have done in the past was to hold a terminal lug in a vice, or with vice grips. Then heat with a torch and partially fill with solder. I would then insert the wire or wires into the hot solder. This seemed to work well to combine several small wires into one lug terminal. Thanks

Pretty sure that is against AYBC.

As warthog said. It creates a hard spot.
 
Back
Top