Prepping transom holes for transducer mount

Classic Parker Boat Forum

Help Support Classic Parker Boat Forum:

This site may earn a commission from merchant affiliate links, including eBay, Amazon, and others.
A friend of mine rebedded all the hand railing on his trawler. He over drilled and filled with epoxy. He inserted a SS nut into the epoxy by attaching it to a bolt sprayed with WD40 or PAM. After he removed the bolt he was left with a threaded hole and SS insert that fit perfectly. Sweet install!
 
rwp48":jaad1kz7 said:
A friend of mine rebedded all the hand railing on his trawler. He over drilled and filled with epoxy. He inserted a SS nut into the epoxy by attaching it to a bolt sprayed with WD40 or PAM. After he removed the bolt he was left with a threaded hole and SS insert that fit perfectly. Sweet install!

Now THAT is cool.

Unnecessary for the X'ducer installation, but a VERY cool concept. Thanks for the tip. I will use this on my Bow rail needs thru-bolts reseated.
 
I usually go between 3/8" and 1/2" depending on the size of the screw, and I put a countersink on it. Don't forget to go deeper than the length of the screw as well.

IMG_1510_zpsbzccsevy.jpg


IMG_1587_zpsdjhoa02w.jpg
 
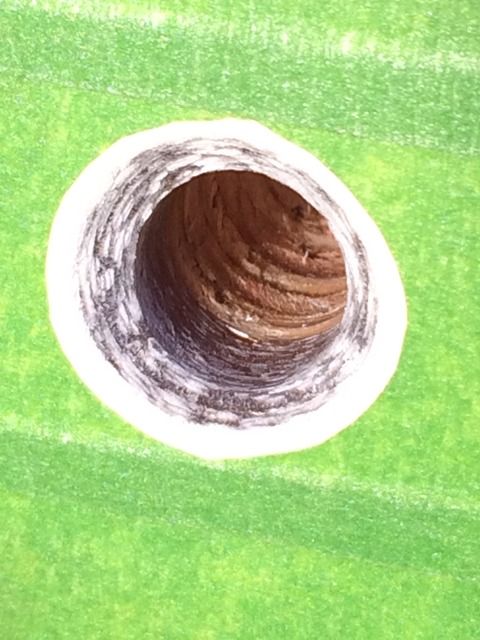
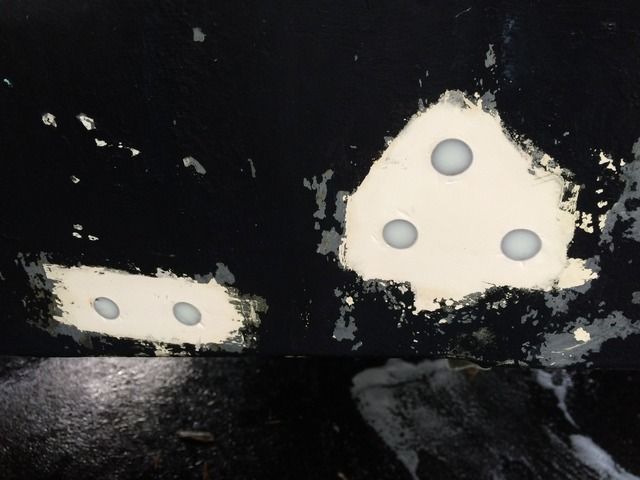
GW204, I can only hope mine comes out that cleanly, only putting screws "IN" though. I see dark edges, and am wondering how much cure time you gave it before taking those pics.

I stopped by West marine this morning, as I work right near the DE memorial bridge, so hopped over after work today & was there at their New Castle DE store in 10 minutes (otherwise 45 minutes from home). Manager claimed he knew Mr. Parker personally, and certainly seemed to know Parker hulls.

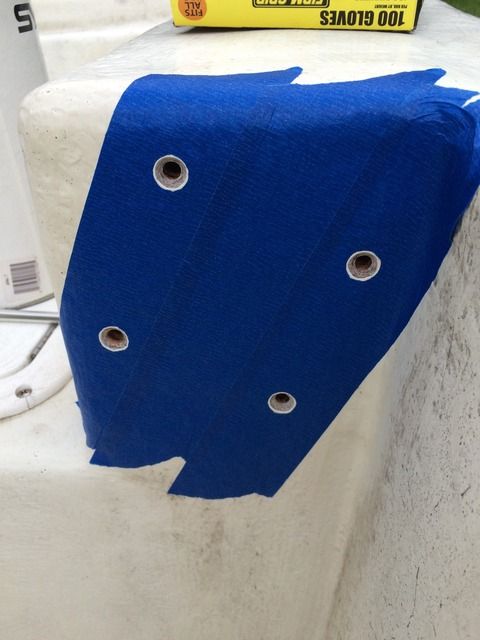
I went to pick up some 105 & 205, plus filler, but he talked me into a caulk-tube of "Six10" epoxy. he said he uses is for all holes he drills & fills. He claimed it has the same 105/205 plus colloidal silica filler. He also claimed it to have the consistency of peanut butter, but I ran some 3/4" test holes in a block of wood in a vise, and found it to be that of mayonaise or possibly thinner. I'm trying it with masking tape over the test holes during cure. Test holes are 3/4"x 1-1/4" deep, and 1-3/8" deep to accommodate 1" screws. The working time of the Six10 is very long, 42 minutes, with full load bearing in 24 hours. I want to see how it drills and holds. Will know tomorrow.
 
SOUTHWINS":1h7ckukq said:
go to stern mate http://www.sternmate.com/index.html
no holes i put 1 on 3 years ago still going good
I looked at one today at West Marine, but they had six "hogged out" holes behind the plate that did not seem as strong as the full plate thickness. Also, once fully mounted, it's not coming off very easily without damage. I would only consider going that route if I absolutely knew where i wanted it. What Parker hull, and where did you mount it? Was it a 2120?
 
Buy and use the 105/205 system and mix some of the cabosil (white) that I sent you- into the epoxy kit to thicken to p' butter. Follow the directions, and you should be good to go!
 
sydngoose":aingzt47 said:
Buy and use the 105/205 system and mix some of the cabosil (white) that I sent you- into the epoxy kit to thicken to p' butter. Follow the directions, and you should be good to go!
Thanks for sending that out. I went there for small cans (& pumps) of the 105/205) & came back with the overpriced small quantity in the dual-chamber caulk-tube. It's hard to believe that their "static mixing nozzle" can mix as thoroughly as a minute or two of mixing in a cup. They also don't quite have the consistency as thick as I'd like it. It could use some more filler. That's why I'm making test bonds & fills just to learn their products. I can see plenty of need down the road for a good sealant & adhesive system.
 
Jersey Jim":1xj28aiq said:
My mistake, the 42 minutes working time of the Six10 I stated, is how long it is workable in the "mixing nozzle" before needing to discard & change nozzles.

Considering you just bought a 2016 2120, I can't envision any major or minor repairs in your near future. So, buying a quart of resin and hardener from RAKA or another epoxy resin manufacturer just doesn't seem reasonable for your application. Those single use kits from WM that you saw and bought are perfect for your one time use application.
Just add the colloidal silica (white cabosil) to the mixed product, a texture between mayonnaise and p' butter, syringe into the holes, wipe smooth with a hand towel, walk away and come back in 24 hours. Should be cured and set ready for your pilot holes.

You'll be fine. Update this thread with pics when you have the opportunity to finish this install.
 
Jersey Jim":1s9x8bpp said:
GW204, I can only hope mine comes out that cleanly, only putting screws "IN" though. I see dark edges, and am wondering how much cure time you gave it before taking those pics.

Just like painting a room in your house, the key to a good job is in the prep. I tape over all the holes I fill first, and then cut out with an Xacto knife. After I fill the hole, I sand it down with a flap wheel on my Dremel to a point where you just dig into the tape. Then I peel the tape and slowly sand it flush.

IMG_2112_zpsomby08nb.jpg


That sanding was done a day or two after the epoxy was applied. The dark edges are due the countersink that exposes the glass under the gelcoat and the translucent properties of the epoxy.

Personally, I wouldn't hesitate to buy a quart kit of epoxy. Unlike polyester and/or vinylester resin, epoxy doesn't have a shelf life. I have some West System epoxy that's probably 10+ years old and some Raka that's probably 6 or 7 years old. I refuse to throw them away because every once in a while I'll need some for whatever reason (my transom holes were filled with the Raka). IMO, if you have a boat, you should always have some epoxy handy...
 
gw204":t13kyiel said:
IMO, if you have a boat, you should always have some epoxy handy...

Truth.

and... FWIW, that epoxy is handy to have for home projects too. :wink:
 
Megabyte":1f4cv61d said:
and... FWIW, that epoxy is handy to have for home projects too. :wink:

Yep. I'm always looking for an excuse to use it cause I like how it smells. :D
 
I don't want to hijack the thread, but have you ever needed to plug a hole in thin glass or foam-backed glass like on a Boston Whaler? I've had two B/W's over the years that I used this method on. After drilling a clean hole cut a small foam rubber "plug" of a larger diameter. Make it as large as possible and still compress it and stuff it into the hole. Don't use the closed cell stuff...you want the foam to soak up as much epoxy resin as possible. Insert the saturated foam plug into the hole (an ice pick is helpful). It will relax and flare out both inside and outside of the drilled hole, kinda like an hourglass shape. You gotta tape around the hole because the resin is gonna run! After the epoxy cures you can dress it up with a razor knife and then sand smooth. The plug flares out in the hole like a wall anchor in drywall. I used this method to fasten a Bimini top to the foam core gunwale on my B/W's and it would withstand running at 25 kts.
 
Foam cored boats (like BW and Everglades) can be a challenge when mounting things on them.
I worked on a neighbors 17' BW and used the epoxy and wood dowel method to mount a new bilge pump in the deck well.
Far as I know, that repair is still going strong.
 
Have you found that the epoxy shrinks in a hole "solely" filled with epoxy? My 1-1/4" deep test holes in a 2x4, shrank back 1/16" after curing with the Six10 product (105/205 w/filler) in a dual-chambered caulk-tube. Mixer nozzle seemed to work well. Drilled 1/8" pilot hole, then #10 screw cranked down quite hard before I intentionally stripped it. Screw friction creates enough heat to soften the cured epoxy some, so slow turns with waiting in between helps much minimizing that.
 
Back
Top