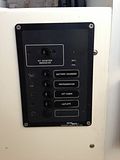
For those that have re-wired their Parkers...

Classic Parker Boat Forum

Help Support Classic Parker Boat Forum:

This site may earn a commission from merchant affiliate links, including eBay, Amazon, and others.
Brent":1wfkbjfk said:
Can the switches and breakers be replaced and keep the panel?
Here is the wiring schematic

Thank you Brent! The panel is really pretty funky the way it is put together. No marine-grade connectors, El Cheapo Carling switches (non marine-grade), and no power bus - instead a series of jumpers from one breaker to the next. LOTS of points of failure! I purchased two of these switches from genuinedealz.com to see if they will be compatible - the dimensions show them to be a drop-in replacement, but with the added benefit of being sealed marine grade and also having LED lights (red for on, clear for off):
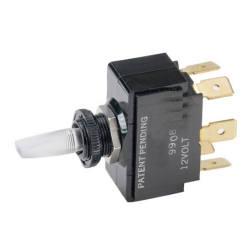
nylonpaddleswitch.jpg


At $5.99 they are a bargain if they work well. Unfortunately, there isn't a SPDT version. The panel pops out with 4 screws and it is easy to replace the switches and breakers from either side (behind the helm or from the front once removed.

This project is really taking on a life of its own. Every place I am finding exposed wire (like at harness connections where the wire is pulling back away from the connector) I am just cutting and re-splicing with marine grade heat shrink connectors. I'm also getting rid of all the piggy bag connectors ("rabbit ears") that are sprinkled all over the helm wiring.

Brent, FWIW, you will notice that on your panel, you have two switches at the bottom that say "accessory". You will find that these supply power to a couple of orange wires with bullet connectors you will find under the aft starboard corner of the galley up under the stove (I'm assuming your layout is the same as mine). This would make it very easy to wire up a stereo or other 12v accessory (like a 12v receptacle) back there up to 10 amps.
 
Thanks Brent

My setup is different.
I have a refrigerator which works poorly and a sink with a combo faucet and hand shower.
It converts into a seat when the seat pad is over placed the sink and a molded foot rest.
I have lots of storage under the cabinet accessed from a hatch on the cockpit side.

I would like to pull the refrigerator and determine if it is repairable. If not, add shelves with the bottom one being on a slider and adding
a portable refrig/freezer (Engel or Waeco) and keep a regular chest cooler in the cockpit with ice b/c we like to overnight
 
Brent":34azct5m said:
Thanks Brent

My setup is different.
I have a refrigerator which works poorly and a sink with a combo faucet and hand shower.
It converts into a seat when the seat pad is over placed the sink and a molded foot rest.
I have lots of storage under the cabinet accessed from a hatch on the cockpit side.

I would like to pull the refrigerator and determine if it is repairable. If not, add shelves with the bottom one being on a slider and adding
a portable refrig/freezer (Engel or Waeco) and keep a regular chest cooler in the cockpit with ice b/c we like to overnight


Fresh water thanks is under the floor
 

Attachments

  • 1994Parker2320ECcabin.jpg
    1994Parker2320ECcabin.jpg
    57.9 KB
Brent I like that set up amazing how much more room you get in the PH with the extended cabin.
 
Brent":3ls0qzl1 said:
Yes I agree

There is more storage in the berth under the pads.
I dont know the correct terms

Someone was wearing their thinking caps when Parker built her.

It also has a transom door maybe called another name (idk)

Sorry Brent I hijacked your project :wink:
 

Attachments

  • 1994Parker2320ECtransomdoor.jpg
    1994Parker2320ECtransomdoor.jpg
    34.8 KB
Brent":3ismny3k said:
It also has a transom door maybe called another name (idk)

Sorry Brent I hijacked your project :wink:

No worries - its all interesting to me! :)

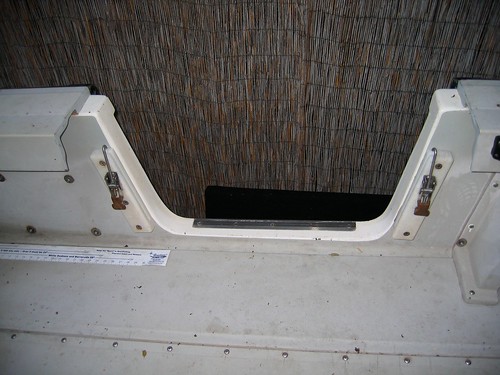
That's one thing I wish I had - a "tuna door" (though I'd use it as a dive door).

Typically if they are on the stern, I see them called "tuna doors"

photo23.jpg


And when they are on the side I see them called "dive doors".

4646267861_9bcfa0f8bb.jpg


Either way, I call them dive doors, since I don't catch tuna. :)
 
Brent #1, I didn't realize you had the open back.

Seeing that pick makes me want to break out the sawzall.

Looks nice!!!

Don't know if I could loose the security though.
 
Love my open-back model and wouldn't have it any other way.
Security has never been an issue in my marina.
 
Seeing that pick makes me want to break out the sawzall.

Oh Hell No. I want roof Air on mine. I look at all these other boats. At one time I dreamed of a 2320, but could not afford it.

I am Soooooooo Glad I have this 2530. Every day I look at it and work on it I just grin that THIS is the right boat for "Me and my partner."
 
OK, so getting this thread back on topic....

Question:

I have a Guest 2631A 30 amp charger (10/10/10) plugged into an outlet that is wired to shore power.

1. Should I just run one lead to the Terminal A of the VSR and let the VSR determine what to charge and when (by leaving the Start battery always "on" when in the slip)

2. Or should I run separate leads to each battery (2 house and 1 start).


Also, is there any problem with clipping off the AC plug and just wiring directly to the AC circuit breaker? (or maybe it has hard wiring connections inside?) The diagrams in the user manual do not show an option for hard-wiring. The unit is mounted within about 3' of the AC circuit breaker panel, and it would be a very easy run.
 
2. Or should I run separate leads to each battery (2 house and 1 start).

That is the way I do it.


Also, is there any problem with clipping off the AC plug and just wiring directly to the AC circuit breaker? (or maybe it has hard wiring connections inside?) The diagrams in the user manual do not show an option for hard-wiring. The unit is mounted within about 3' of the AC circuit breaker panel, and it would be a very easy run.


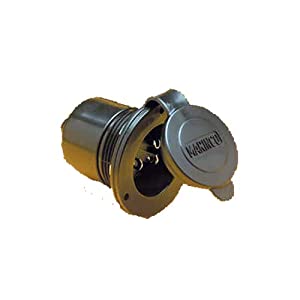
If you have a A/C panel......That is the way I'd do it. In most boats there isn't one, so I use the Marico bulkhead Male plug. But still cut the factory plug off.

41WWrm0R7fL._SL500_AA300_.jpg
 
I have an AC circuit breaker panel mounted to the box that the helm seat is mounted to. The charger (and two duplex AC outlets) is mounted just behind the helm seat off to the right side.


Strangely, there is a circuit labeled "charger" but the charger is instead plugged into one of the outlets.
 
SBH2OMan":jnezkp9b said:
Brent":jnezkp9b said:
Can the switches and breakers be replaced and keep the panel?
Here is the wiring schematic

Thank you Brent! The panel is really pretty funky the way it is put together. No marine-grade connectors, El Cheapo Carling switches (non marine-grade), and no power bus - instead a series of jumpers from one breaker to the next. LOTS of points of failure! I purchased two of these switches from genuinedealz.com to led bulb see if they will be compatible - the dimensions show them to be a drop-in replacement, but with the added benefit of being sealed marine grade and also having LED lights (red for on, clear for off):
nylonpaddleswitch.jpg


At $5.99 they are a bargain if they work well. Unfortunately, there isn't a SPDT version. The panel pops out with 4 screws and it is easy to replace the switches and breakers from either side (behind the helm or from the front once removed.

This project is really taking on a life of its own. Every place I am finding exposed wire (like at harness connections where the wire is pulling back away from the connector) I am just cutting and re-splicing with marine grade heat shrink connectors. I'm also getting rid of all the piggy bag connectors ("rabbit ears") that are sprinkled all over the helm wiring.

Brent, FWIW, you will notice that on your panel, you have two switches at the bottom that say "accessory". You will find that these supply power to a couple of orange wires with bullet connectors you will find under the aft starboard corner of the galley up under the stove (I'm assuming your layout is the same as mine). This would make it very easy to wire up a stereo or other 12v accessory (like a 12v receptacle) back there up to 10 amps.
From where I could get this setup at affordable prices
 
Back
Top